Showing posts with label trash to terrific. Show all posts

Thursday, March 5, 2009

Curb-side crime!

Drive by junking, trash picking, dumpster diving − whatever you want to call it − doesn’t always work for me.

A couple of years ago I was garage sale-ing with my friend Joan when I found a bonanza of old lumber by a curb. It wasn’t discarded used privacy fencing. This lumber was the good stuff, old and weathered, time-worn and wonderful, big ol’ wide boards!

Some man was working through the pile and I asked him if I could pick some up. “Sure. Take all you want,” he said, so I hustled home, got IT Guy’s truck, and hurried back.

No man was around by that time but I donned my work gloves and started loading. I’d gotten the pickup halfway loaded when this woman tears out of the house yelling, “What are you doing?”

Long story short she let me take one load of lumber. She probably felt sorry for me because I was all red faced and teary eyed from getting caught stealing!

This cabinet is one of the pieces I made with the stolen boards. These pictures are my dusting photos. It's really embarrassing when one has to have photographs of one's junk in order to dust the shelves and put the crap things back where they belong.


Dusting photos sure make life simpler!

Tuesday, February 24, 2009

Trash to Terrific!

Want a good time without callin' that number on the wall in the Ladies Room?

Then jump on over to Sanctuary Arts Make-over Day and visit the blogs signed up on her Mr. Linky. Get motivated by all the exciting projects linked there and be sure to leave lots of comments!

So here's my make-over for Jen R.'s Mr. Linky.

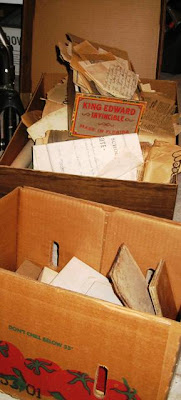
Ever since Emily Interesting showed me her decoupaged suitcase, I've wanted to do one. I decided right then and there to search garage sales until I came up with the perfect suitcase to decoupage with some of my M-I-L's old things. She has a ton of stuff, as you can see.

I got lucky at the only garage sale I had time to stop at Saturday. There sat two suitcases just like I wanted. In order for this project to work the suitcases had to be old, they had to have trim around the edges, and they had to be priced right.

Cost: five dollars for both. Don't you love it when a plan comes together? And I also love the make-do handle on the smaller suitcase. Apparently, it's seen a lot of traveling.


So I dug through all of M-I-L's stuff and, after figuring out what I wanted to use, I laid it all out in an interesting arrangement on the flat surfaces, making sure none of the old blue covering showed in the gaps between the items.

Next I decoupaged everything down. When dried, I covered the whole thing again with decoupage. This step is important because I wanted to make sure everything was coated, otherwise the next step wouldn't give me the effect I desired.


When the piece dried again, I rubbed it down with burnt umber craft paint until I had an aged effect. Then I painted around the edges of each item to simulate shadows. You might like thicker or darker shadows than I did.


For a finished product I added another layer of decoupage.


Here are both finished suitcases...


...ready to stack in the guest room for visitors to set their drink or book on.


Anybody want to come visit me? Hmmm, I could rent out my spare rooms for Warrenton.....

Thursday, February 19, 2009

Trash to Terrific!

Bar Doors
The same day I bought the now-upside-down headboard/room divider I saw a pair of five dollar unfinished swinging bar doors.

I. h.a.v.e. a.l.w.a.y.s. w.a.n.t.e.d. s.w.i.n.g.i.n.g. b.a.r. d.o.o.r.s!

They are so cool and western. This pair was in pretty rough condition, with water damage and missing hardware. The hardware that was still there was nasty!

Renee and I again went back at the end of the garage sale (we're getting famous for that) and I got them for, you guessed it, a dollar, my favorite price!

At home I removed the yucky hardware, filled in the old holes, and glued and clamped some splits in the wood.


New hardware was a couple of bucks but very easy to install. It was a snap to get the two doors to be even up and down, forward and backwards, especially since I left that part up to IT Guy, but it did look easy!


After installation I took the doors back down and sanded them after filling in some of the really rough spots with wood putty. Then I spray painted them black, of course.

Between each coat of paint I used extra fine steel wool to smooth the surface. I then put some brown paint on top of the black for an aged look (see right door), again rubbing the paint with steel wool until I got the effect I wanted (see left door).

Come on in and I'll buy ya a drink!


Terlet Paper Storage

Here's another find from that day but I probably overpaid for it - two whole dollars! It's some type of old feeder, all rusted and nasty just like I love stuff. I cleaned it up with a wire brush, then spray varnished it with some clear rust preventive.

I put the terlet paper storage unit in the guest bathroom and left the feeder door open just a little so visitors that might feel the need for gobs of terlet paper can see where it's stored.