Wednesday, August 15, 2012

Claiming Reclaimed Wood


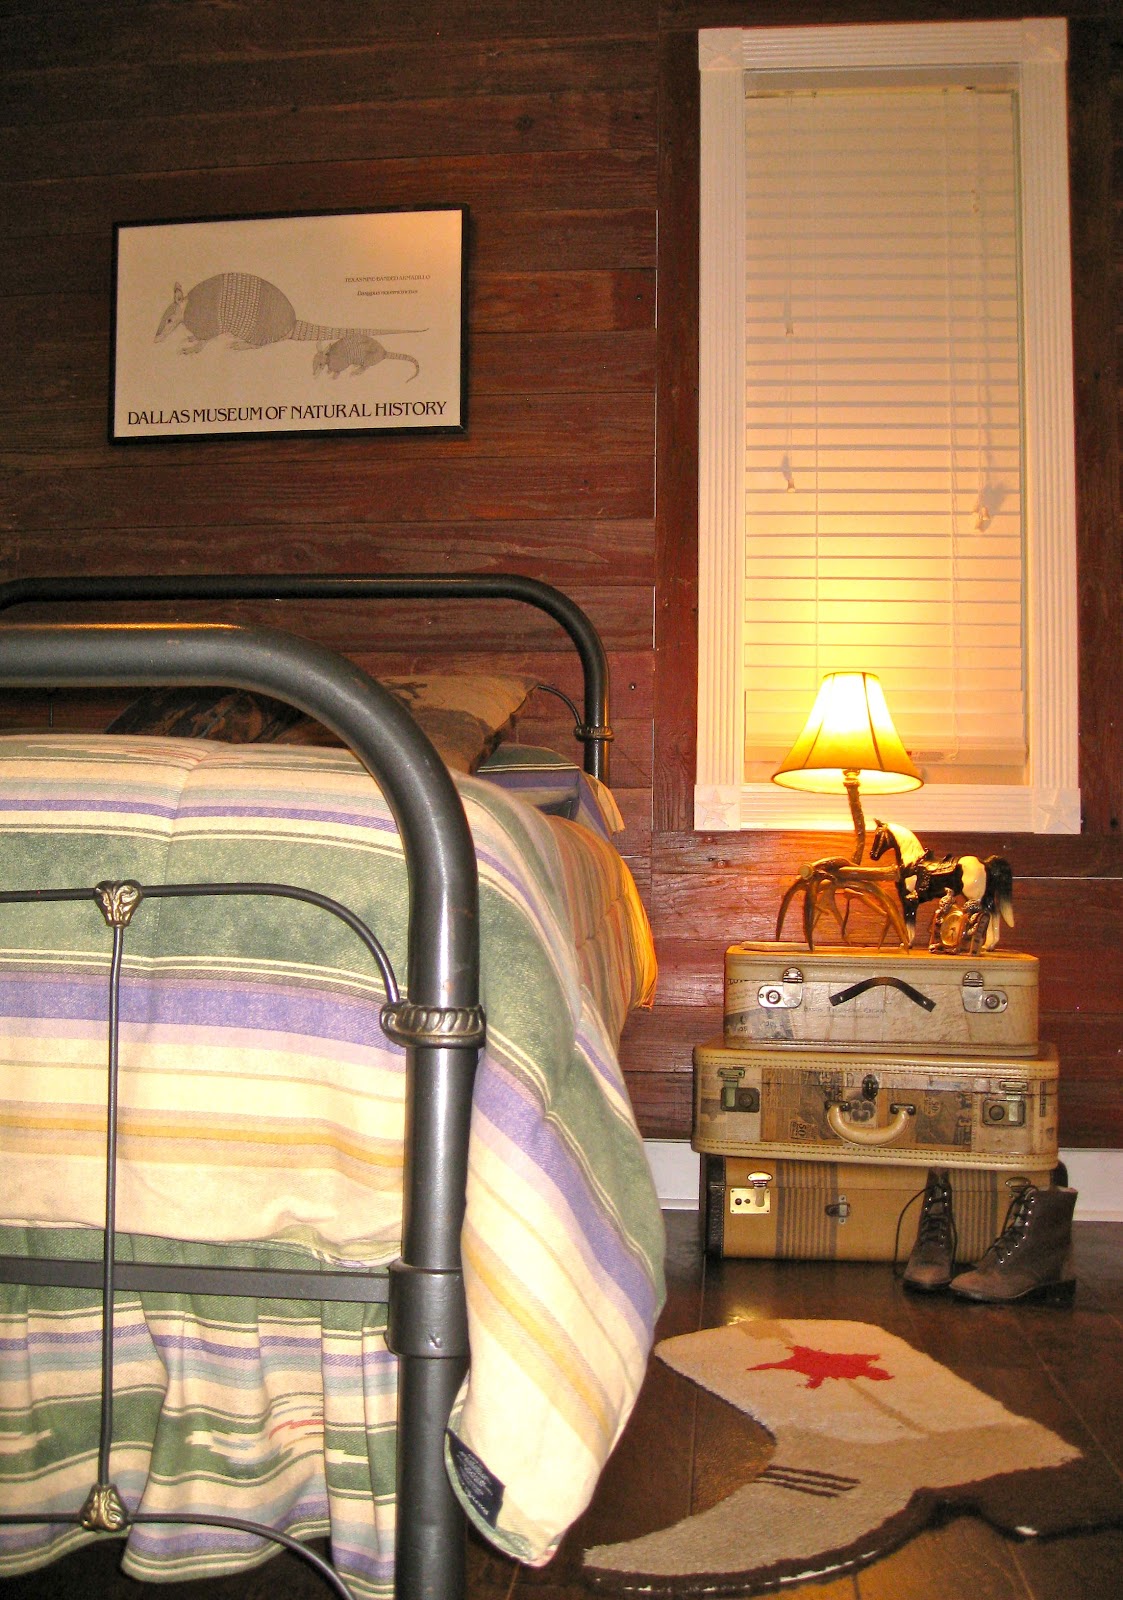
Weathered wood. Barn wood. Reclaimed wood. It's beautiful no matter what you call it. 

I found the sides of an old, red grain truck in a friend's barn and quickly claimed the reclaimed wood!


Heavy. Oh, my, they were heavy but Juan Hauls-It-All helped me lug them home. My idea was to turn this room...


...into this room...


So I separated the boards, scrubbed them clean of dirt and bugs, and started planning the best way to use the limited supply of long boards.


The wall is 13 feet across with windows five and a half feet apart. The boards were 16 feel long. To make the boards go as far as possible with the smallest amount of seaming, I decided to rip some boards that were in almost unusable condition and use them to trim around the window. The trim work cut the between window width to five feet exactly, letting me get three boards from each 16 foot board.


To help wedge together the tongue and groove boards Juan showed me how to use a small jack and a long board. Every time I put a new board up, I also had to chop off five inches of the long board. I ended up with a very short board!


With that system in place, it was just a matter of working down the wall until I got under the windows. At that point I started working up from the bottom. I knew I would have to piece together one row of board and I didn't want it to be the bottom one. A whole board would make the bottom edge even and make working on the electrical boxes easier.


At Lowe's they sell a little blue see-through box called an outlet extension for a whole $1.39.


As its name implies, the box extends the original outlet box to make the outlet cover flush with the new wall surface. BE SURE TO TURN OFF THE ELECTRICITY AT THE FUSE BOX (or whatever they call those boxes nowadays) BEFORE PUTTING IN THESE EXTENDERS!  I figure if you're handy enough to be redoing wall surfaces, you'll easily be able to add these extenders!


Perfect is good enough!


Monday, August 6, 2012

Wasps!


Before we built the perfect country house on our perfect country place (in fact, long before we even put the travel trailer on the land), I placed an old enamelware thunder bucket in the shed and hung a roll of tissue on an enormous nail nearby.

Us girls need our privacy. Boys can find a tree!


We hadn't been back to that corner of the shed in awhile. And when Juan Explorer did venture there yesterday...


...wasps were using the tissue...


...in an unconventional way...


...with an unconventional window.


They were evicted!


Thursday, August 2, 2012

Corbels - The Finishing Detail


A corbel is an architectural bracket or block projecting from a wall and supporting (or appearing to support) a ceiling, beam, or shelf. (http://architecture.about.com/) 

Corbels don't have to be fancy to add the perfect finishing touch to a porch. They can even be homemade.


Take my star corbel, for example. Simple. Easy to make. And looks great, if I do say so myself!

It took some experimenting to come up with a design I liked and could do with the tools I already owned - a bandsaw and a chop saw. A scroll saw would do but might make the job a lot harder.


I used a 1 x 12 for the main part of the corbel, using the pattern I'd made to trace each one on the board. Notice how I cut in from the corner to cut out the star.


And I made a bunch of them, enough for the back side of the porch. I'll be making 58 in all. Phew!


After I screwed the piece onto a base, I used painters caulk to fill in the cut-in from corner to star. Then I painted the whole thing.


A screw on each end of the corbel and it was easily hung.


They make a nice finishing touch for the back porch, I think.


And only 42 more corbels to make!


Tuesday, July 24, 2012

Texas Tail Continued


Yesterday I told you the tale of acquiring an antique windmill and hanging it in our home. We had designed our great room around this vintage sculpture, reinforcing the wall in the stud stage and adding a dedicated spotlight in the electrical stage. 

Hanging was made easy with two sturdy hooks buried into the reinforced wall.


When this big guy crashed to the ground many, many years ago, the tail had taken the brunt of the fall. Juan Handyman straightened it as best he could without eliminating the character that age and accident had created.


Two screws hold the four foot tail to the wall. A small bird adds the focal point the sculpture needed.


A cowboy boot bench grounds the gigantic piece of art to the ten foot high wall.


Yes, the playing cards are faux painted on the bench.


And now our great room is finished.


Day or night, we love this piece of vintage art.


Goodnight, sweet little birdie.
(No real birdies were hurt for this windmill.)


Monday, July 23, 2012

Long Texas Tale of a Windmill Tail


Ever fall in love with something that (a.) you didn't have a need for, (b.) you didn't have space for, and, most important, (c.) you couldn't have?


That's what happened to me and this grounded windmill on my friend's dairy farm. Oh, I coveted their antique windmill. But they loved it too.

Years passed. My friends closed their dairy and bought a deer farm. Their windmill love transferred to TWO working old windmills on the new place, freeing my grounded love for display in my new home.


It flew into the house on rays of sunshine and the strong arms of Juan Good-Guy and two of his friends.


Since it's eight feet across, the windmill was relieved of three of its blades to fit through the doorway but they were immediately replaced.


The vintage sculpture wasn't finished but other projects needed to be completed. It was enough for me to see this much in place.


(To be continued tomorrow.)

Monday, June 11, 2012


Dear Missy Redlover, 

Thank you for the vintage wire basket filled with goodies. 


I adored everything in it AND the basket itself. As you can see, I put it to good decorative use immediately, leaving on, of course, that wonderful medallion of Texas.

I've said it before and I'll say it again: You, lady, have a knack for decorating, whether it's your home or your gift packages! 


Love,

Monday, June 4, 2012

Reluctantly white!


You know that I paint ANYTHING that holds still!


But I also love the natural aging of things, like the patina on my in-laws first bed.


For years we used it at the old house as a firescreen but it was too big for the fireplace in the new house.

And then I saw THIS on Pinterest:


Absolutely beautiful!

I HAD to have a gate like that!

So after minimum pleading on my part, Juan Great-Handyman made me one out of his parent's bed.


Oh, I loved it!


It made my heart sing!

Except...

it disappeared into the colors of the landscape.

Reluctantly, I painted it white like the board fence.


Much better! 


And to keep little doggies in...


I backed the gate with welded wire.


Perfect. 

The old chain also held a gate shut on Juan's parent's farm years ago.


There was only one thing left to put this beauty over the top...


...and they come around every night before sunset.


Ain't country livin' grand!