Showing posts with label new house. Show all posts

Tuesday, July 24, 2012

Texas Tail Continued


Yesterday I told you the tale of acquiring an antique windmill and hanging it in our home. We had designed our great room around this vintage sculpture, reinforcing the wall in the stud stage and adding a dedicated spotlight in the electrical stage. 

Hanging was made easy with two sturdy hooks buried into the reinforced wall.


When this big guy crashed to the ground many, many years ago, the tail had taken the brunt of the fall. Juan Handyman straightened it as best he could without eliminating the character that age and accident had created.


Two screws hold the four foot tail to the wall. A small bird adds the focal point the sculpture needed.


A cowboy boot bench grounds the gigantic piece of art to the ten foot high wall.


Yes, the playing cards are faux painted on the bench.


And now our great room is finished.


Day or night, we love this piece of vintage art.


Goodnight, sweet little birdie.
(No real birdies were hurt for this windmill.)


Monday, July 23, 2012

Long Texas Tale of a Windmill Tail


Ever fall in love with something that (a.) you didn't have a need for, (b.) you didn't have space for, and, most important, (c.) you couldn't have?


That's what happened to me and this grounded windmill on my friend's dairy farm. Oh, I coveted their antique windmill. But they loved it too.

Years passed. My friends closed their dairy and bought a deer farm. Their windmill love transferred to TWO working old windmills on the new place, freeing my grounded love for display in my new home.


It flew into the house on rays of sunshine and the strong arms of Juan Good-Guy and two of his friends.


Since it's eight feet across, the windmill was relieved of three of its blades to fit through the doorway but they were immediately replaced.


The vintage sculpture wasn't finished but other projects needed to be completed. It was enough for me to see this much in place.


(To be continued tomorrow.)

Monday, May 21, 2012

More chalk paint magic!


I had looked at every garage and estate sale, asked every hoarder friend (of which I have many!), and checked out every antique store...twice...when there it was. 

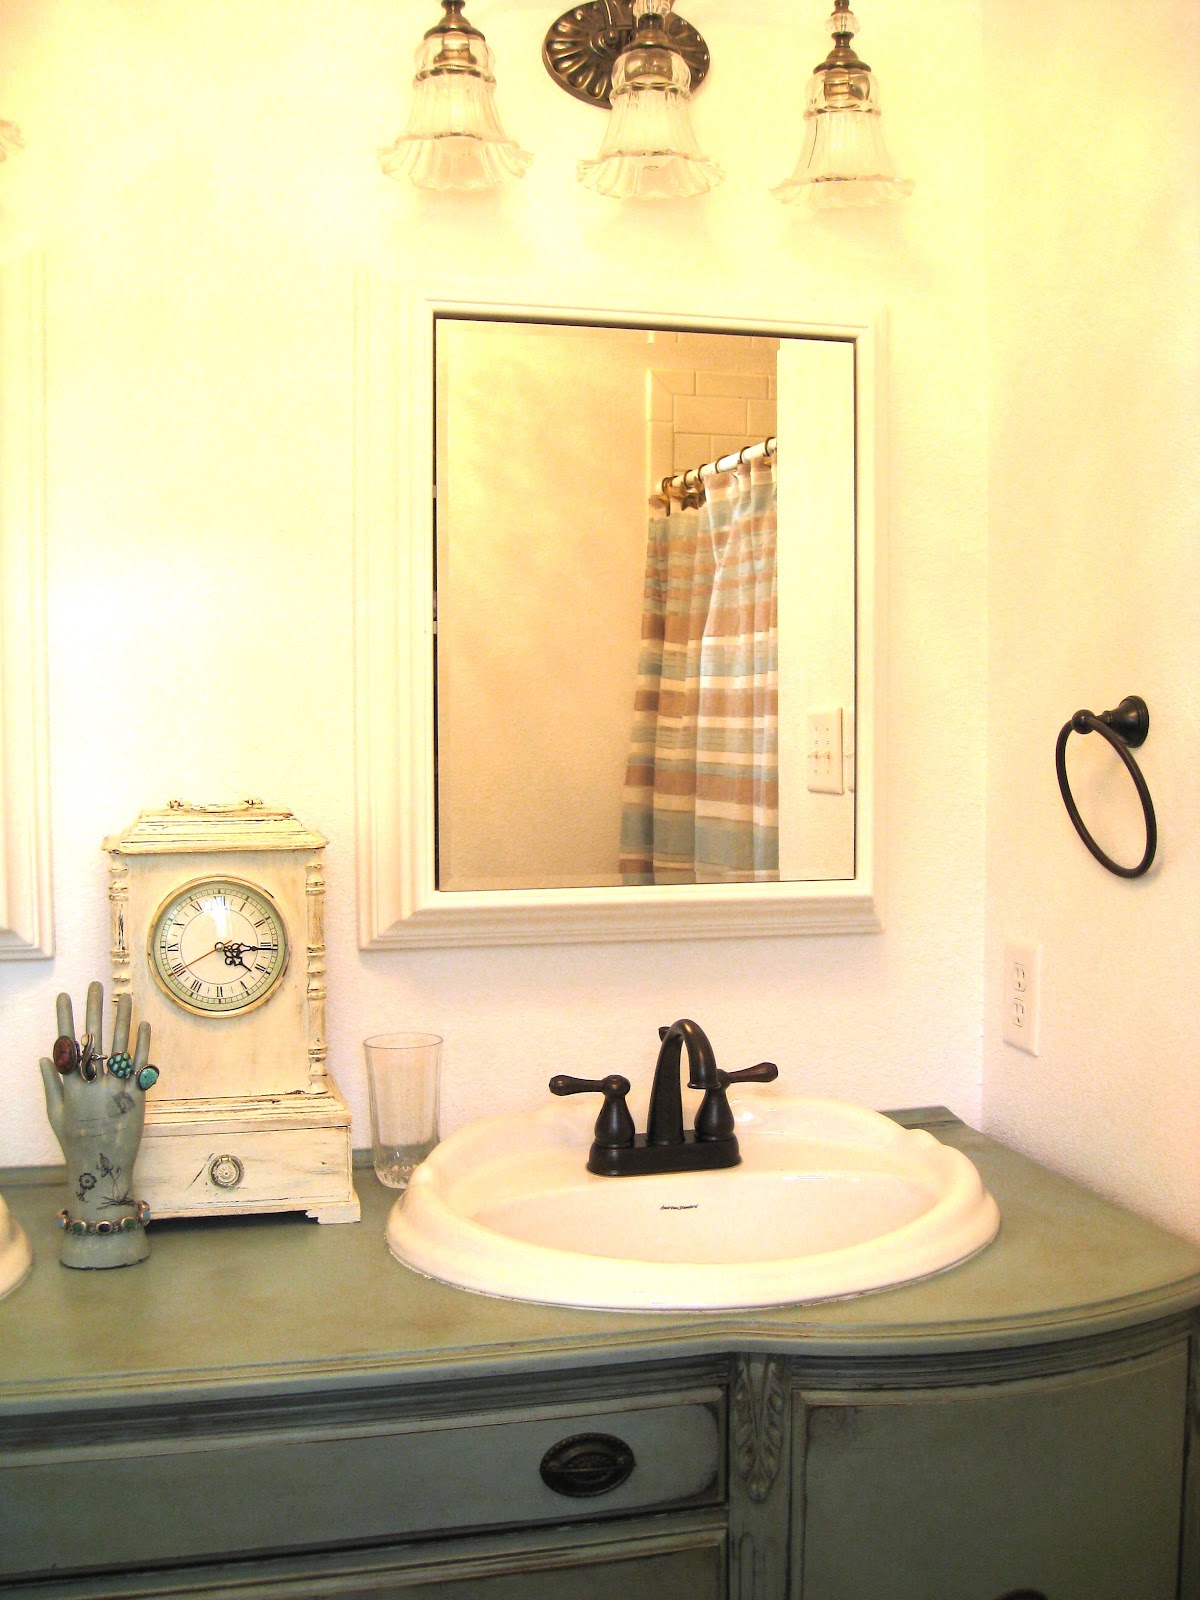
The perfect size. The perfect shape. The perfect dining room buffet, just waiting to be rejuvenated into the perfect bathroom vanity.


And I was just the woman to do it! 


So once again I pulled out my Annie Sloan Duck Egg Chalk Paint and performed Annie Sloan magic.


Since it was going to be used in the master bath, I made sure it got a GOOD waxing, first with clear wax, then with dark wax, then with clear again.


I needed, of course, the perfect sink for the piece. Really, I needed TWO sinks. I had to get twice as lucky with the sinks but with the help of the gal at my plumber's supply house, I got these two beauties, which are discontinued models. Isn't that always the way it goes? She really came through for me.


The shower curtain is a Wal-Mart cheapie but I love it. It ties together the the chalk paint colors and the flooring. Don't hate me for going to WM this once!


Next post? Lighting for this room. You won't believe it!!!


No, not these lights. You'll just have to stay tuned!


Friday, May 11, 2012

What I do to save a buck!


Or:

How cheap am I?

Rails on one side on the house are done. Whoopee!

Dern, that was a lot of rails - a hundred and fifty on that side alone, and that's a short side!


At a buck a spindle (or more, depending on the deals at the box stores that week), that's a bunch of money!


And I have a bunch of rails to go! 

So, how cheap am I? I make my own rails. 

First, I go to my stack of lovely scrap wood that my son Michael and I stacked neatly. I am a hoarder of wood and he's my enabler! 


(That wavy wooden thing in back of the stack is a long bench I made from hoarded lumber.)

I then cut down the selected wood to the desired size...


...and rip it to make the rails.


Then it's just a matter of chopping the ends...


...and rounding the edges with the sander.


How cheap am I? 

Pretty dern cheap. But it puts about $600 in my pocket and all it took was a little time and a penchant for hoarding!

Tuesday, April 3, 2012

Venting at the New House


I hate that "new house" look and feel. So fresh, so perfect, so...uninteresting!

In fact, I hate it so much that long before our builder started on our new house I made plans for architectural details that would give the place an old, country look. With a little demolition, anyone can add these types of details to their home.

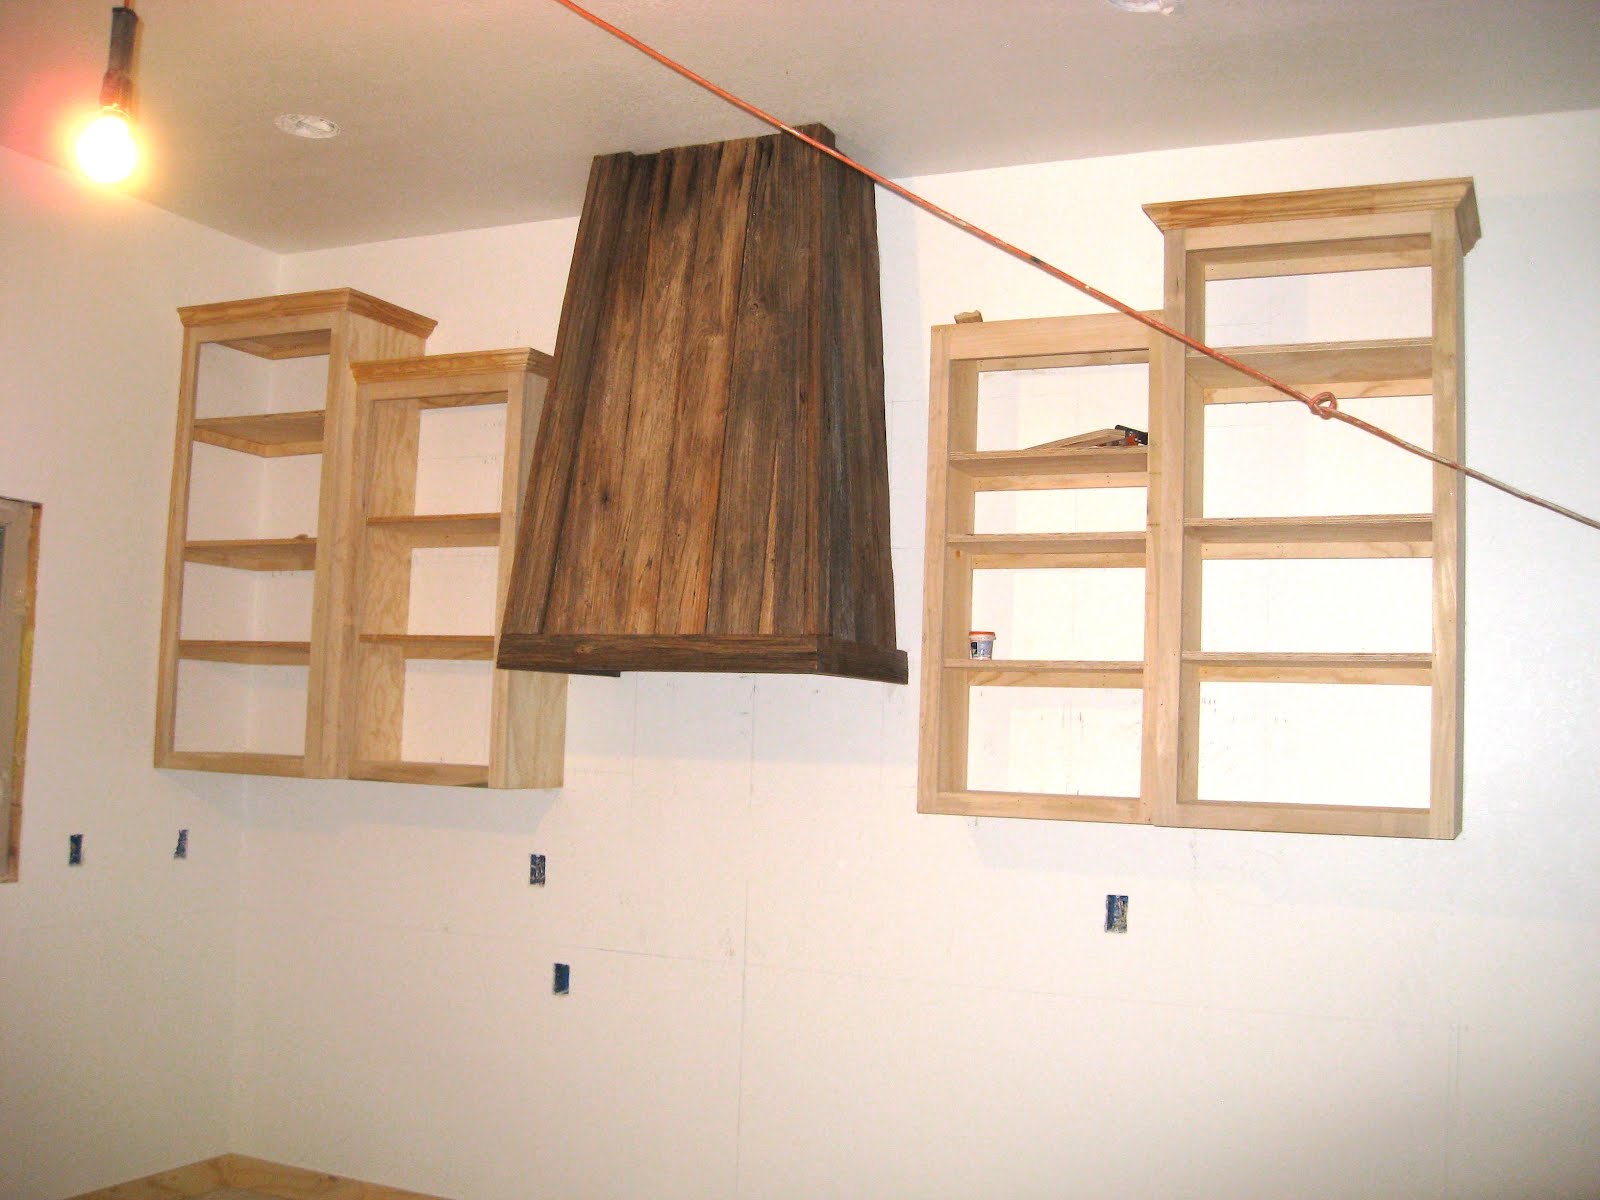
Take my kitchen vent hood for instance.


On second thought, DON’T take it. I wanta keep it right where it’s at.

After the kitchen walls were constructed in our new house, the carpenter marked where the cabinets were to be placed. I wasn’t liking it. Even though he and I had had “the talk”, he wasn’t giving me the space I needed for the vent hood.

“OK,” he told me, “I’ll start Monday. That gives you two days to build your vent hood before we begin on your cabinets.”


Two days? Talk about pressure.

So ignoring the marks on the wall, my husband and I started building, keeping in mind the standard vent hood innards I'd bought at a box store. I already knew the design I wanted – something big to go with the 10-foot ceiling, something recycled to go with the rest of the décor, and something unique that would match the future fireplace at the other end of the room.

I’d been hoarding barn wood from a friend’s dairy for this project. I just didn't think I'd be building with it so soon!


(Note: If you're using old barn wood, know what it was originally used for. I would not want to use wood from a chicken house [yuck] or chemically-treated wood [dangerous fumes]. My boards came from a hay fence but I still gave them a good scrubbing.)

Old wood has good features and bad. On the plus side, you can make mistakes or mishandle the wood and all mars disappear among the rest of the interesting, aged marks.

On the down side, the wood can be crooked, bowed, and rough, making it hard to work with. Also, when I had to rip or cut a piece, I had to get out my craft paints to make the newly-revealed fresh wood look just as old as the rest of the boards.


Late, late, LATE Sunday night I put the final coat of varnish on our beautiful vent hood. We’d made the deadline. Monday morning, after remarking the cabinet placement, the carpenters started building our kitchen cabinets.


On his last day of work at the house, the head carpenter confessed that when he walked into the house that Monday morning, he was shocked (in a good way) at what we had designed and built. Hooray for DIY!


P.S. In case you're wondering, the microwave is in a cubby below the counter top, an easier position to work with for us short cooks.


Wednesday, June 1, 2011

Like a Phoenix

Just like the song says, what a difference a day makes, 24 little hours.

When we last left the McDebt McMansion site Monday evening, this was our view - a nice slab of concrete with some iron work for porches.


What we were greeted with upon arrival Tuesday evening made me gasp with pleasure. The McDebt McMansion, like a phoenix, rises!


In one day - ONE DAY - the whole first floor sprang into the air, although I doubt if the crew that worked on it in the 100 degree heat felt it went up so easily!

Here Juan McDebtor enters the back door for the first time...


...to view his land through the newly-formed front windows...

...and back ones.


And as the sun sets outside of one of the great room's windows (dramatic, huh?), Juan and I marvel at the whirling thoughts and ideas chockablock (my word for the day) in our brains as we dare plan for the unknown future.


Through the combined good fortune of my sister from Denver finding this lovely property and the new neighbors becoming loving friends AND our building contractor, Juan McDebtor and I indeed feel blessed.


Sunday, May 29, 2011

Tote and Table

I am so excited to give you a sneak peak of my old tool tote and farm table sitting in my new home.


My new home isn't totally weatherized yet...


but I feel it will be done any day now.


I bought the old tote several husbands ago, before tool totes had any value at all. I picked it up for a song, and maybe a dance, not even knowing what I'd do with it. When the boys were young, the tote sat in the hall by the back door and held their muddy shoes and boots. Then it graduated to the garage where Juan Last Husband used it for it's intended purpose - tools!

Now it has been upgraded to the house once again and has a place of honor because when we bought this property, guess what I found in one of the outbuildings? This beautiful farm table!


Oh, it was in terrible shape...


...cupped top boards, termite damage, deep gouges, and chippy legs. But it was huge and had such potential! When Juan Last Husband and I were moving it, he noticed printing burned into one leg.


It reads, "A. & M. C. Dining Hall".

Now for all you non-Aggies, A&M University hasn't been a college since 1963. So this baby is OLD. Being retired from A&M, and with Juan Last Husband still working there, I knew I had to bring this big darling back from the dead. The chippy legs and printing were gonna stay!


I couldn't bring myself to retop the table with new boards so I worked madly on getting the double tongue and grooved boards back into shape. I even had to scrape off gum from the underside of the table, although I did leave one piece in honor of all those military boys who sat at this table and ate...after they parked their gum underneath!


UPDATE: Love and Renovations posted about an old A&M table she saw at Round Top. Pictures are about halfway through her article. Amanda, the blogger, said, "This, my friends, is a table from Sbisa dining hall at Texas A&M. It lived there from 1912 to 1926..." Thanks Rosemary for sending the site my way!