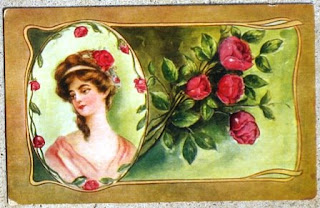
Email is very efficient, but unless the verbiage they carry is a lot different from the ones I get, email is not a very romantic form of communication - not like these postcards that I rescued from my m-i-l’s house in Brownwood years ago. Notice the back of one of the postcards gives the date as 1909 on the postmark.


So, how does one go about taking closeup photos with a point-and-shoot digital camera? Here's how I do it. If you already know this, or don't care to know this, or are a Mac user (I don't have anything for Mac users. Sorry), just enjoy the pretty postcards.
First I put the object to be photographed (the postcard in this case) at my feet. I'm standing, trying to keep my shadow off of the card. You could sit and take the picture, but if you are using a flash, you might get a hot spot across your object. Taking the picture outside, where I took my photos, eliminates that problem. I then use the zoom feature on my camera to get closer to the object, trying to keep the card as straight as I can in the viewfinder.
I take the flashcard out of my camera, stick it into my laptop, and open my menu by pressing the Window's symbol on the lower left of the keyboard and alphabet letter E button at the same time. I then browse to the flashcard drive, click on it, find the photo I want, and double click on it. This opens the photo in Microsoft Office Picture Manager. I click on Edit Photo which opens the toolbar, and then click on Crop. This show the edit marks on the sides of my photo. I then pull in those marks by putting my mouse over the marks. When I get the size to my liking, I click OK. I then go to Resize to reduce the amount of pixels (making it easier and quicker to open on the web or in email), find which size I desire, click on it, then click OK. I then go to Save As to save the photo where I want it.
 And there you have it, a nice closeup without a tripod or fancy lens. And you've cropped your feet out of the picture.


Great info and great cards. Deb
ReplyDelete